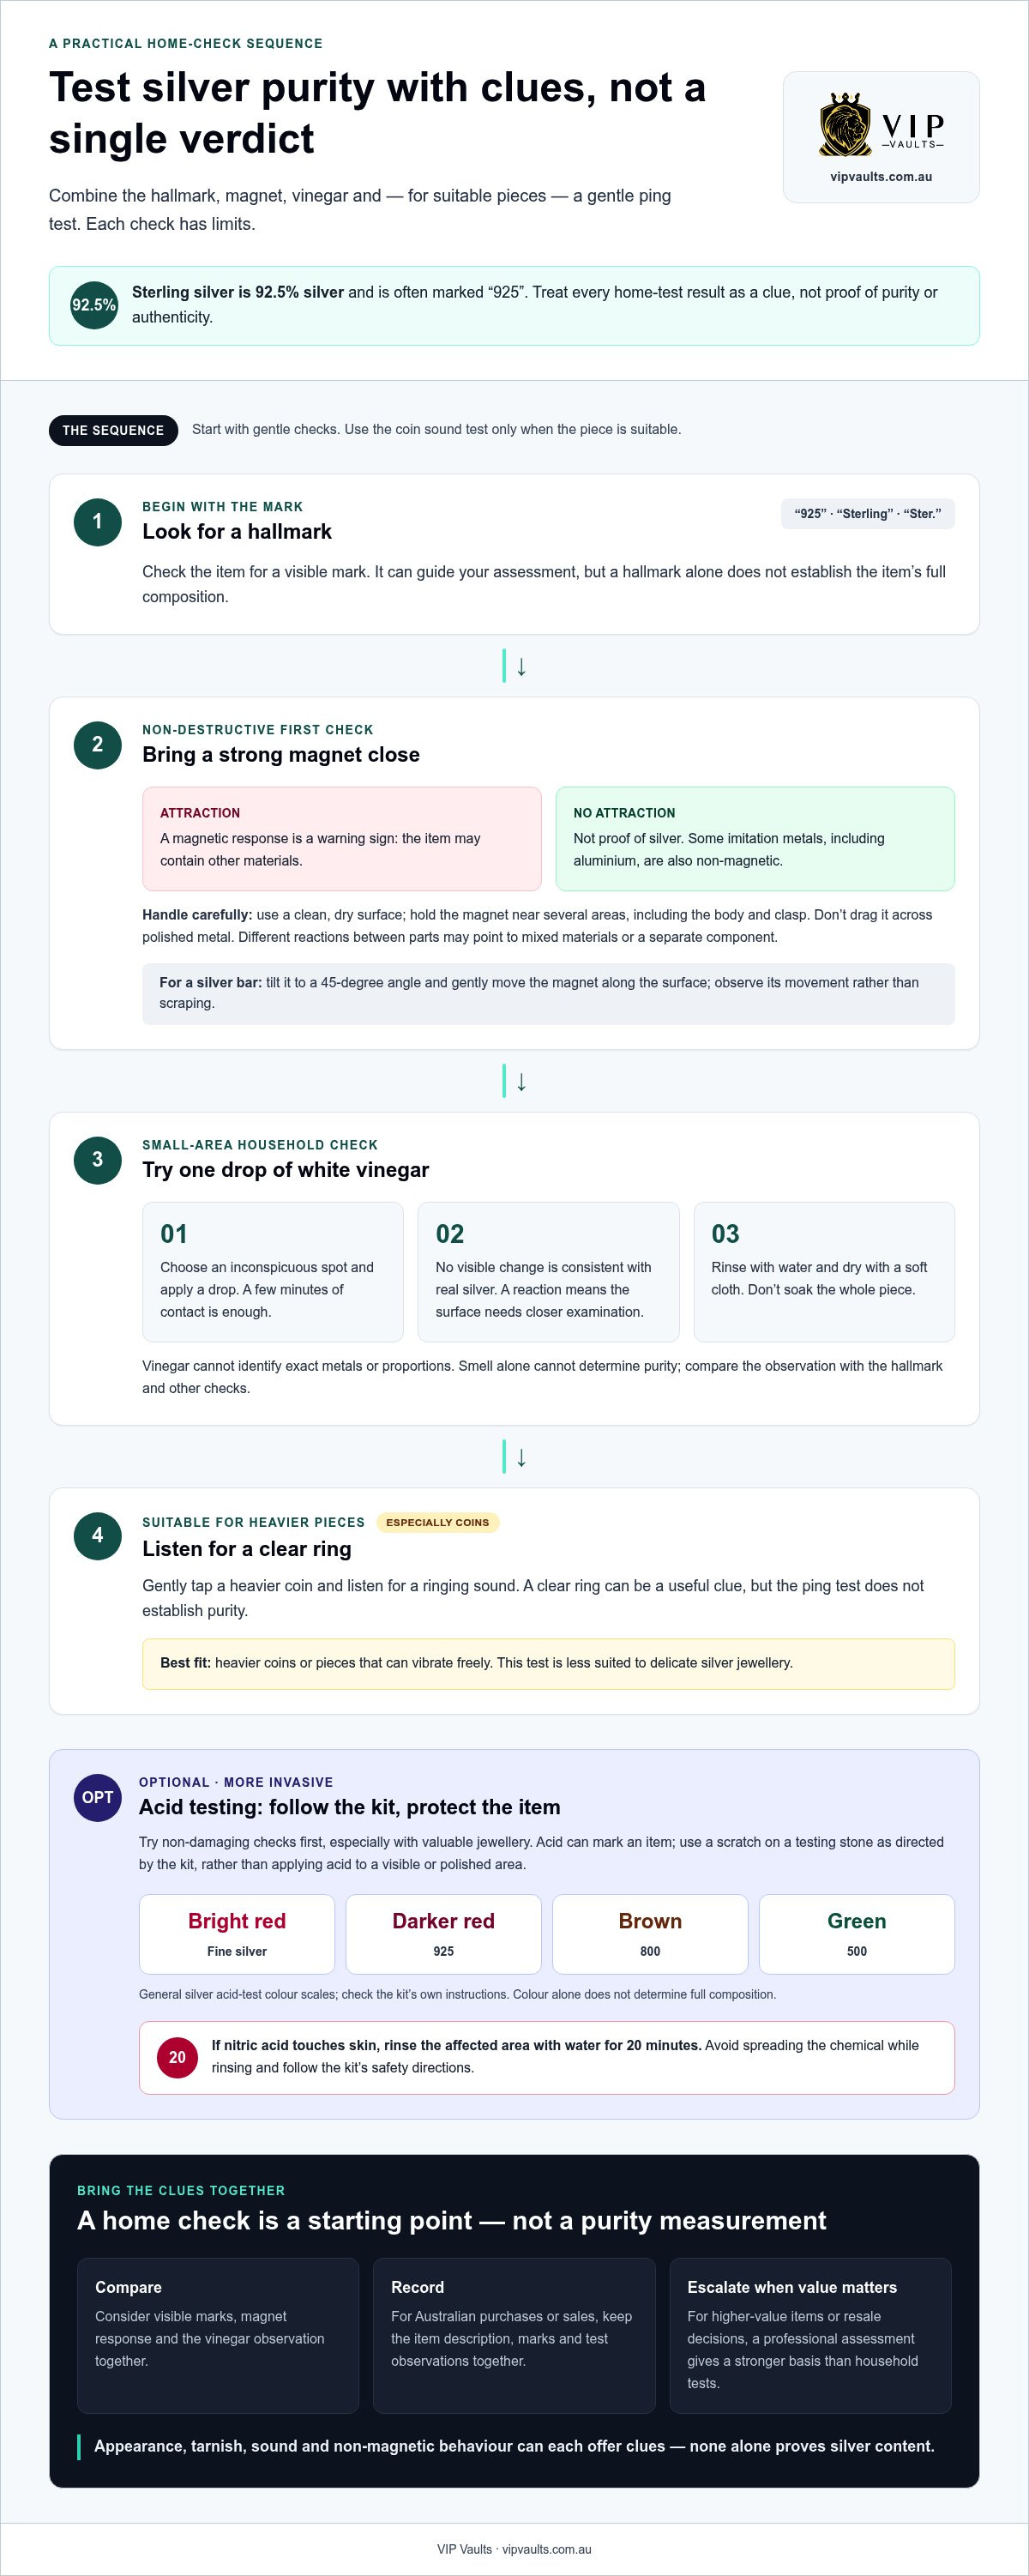
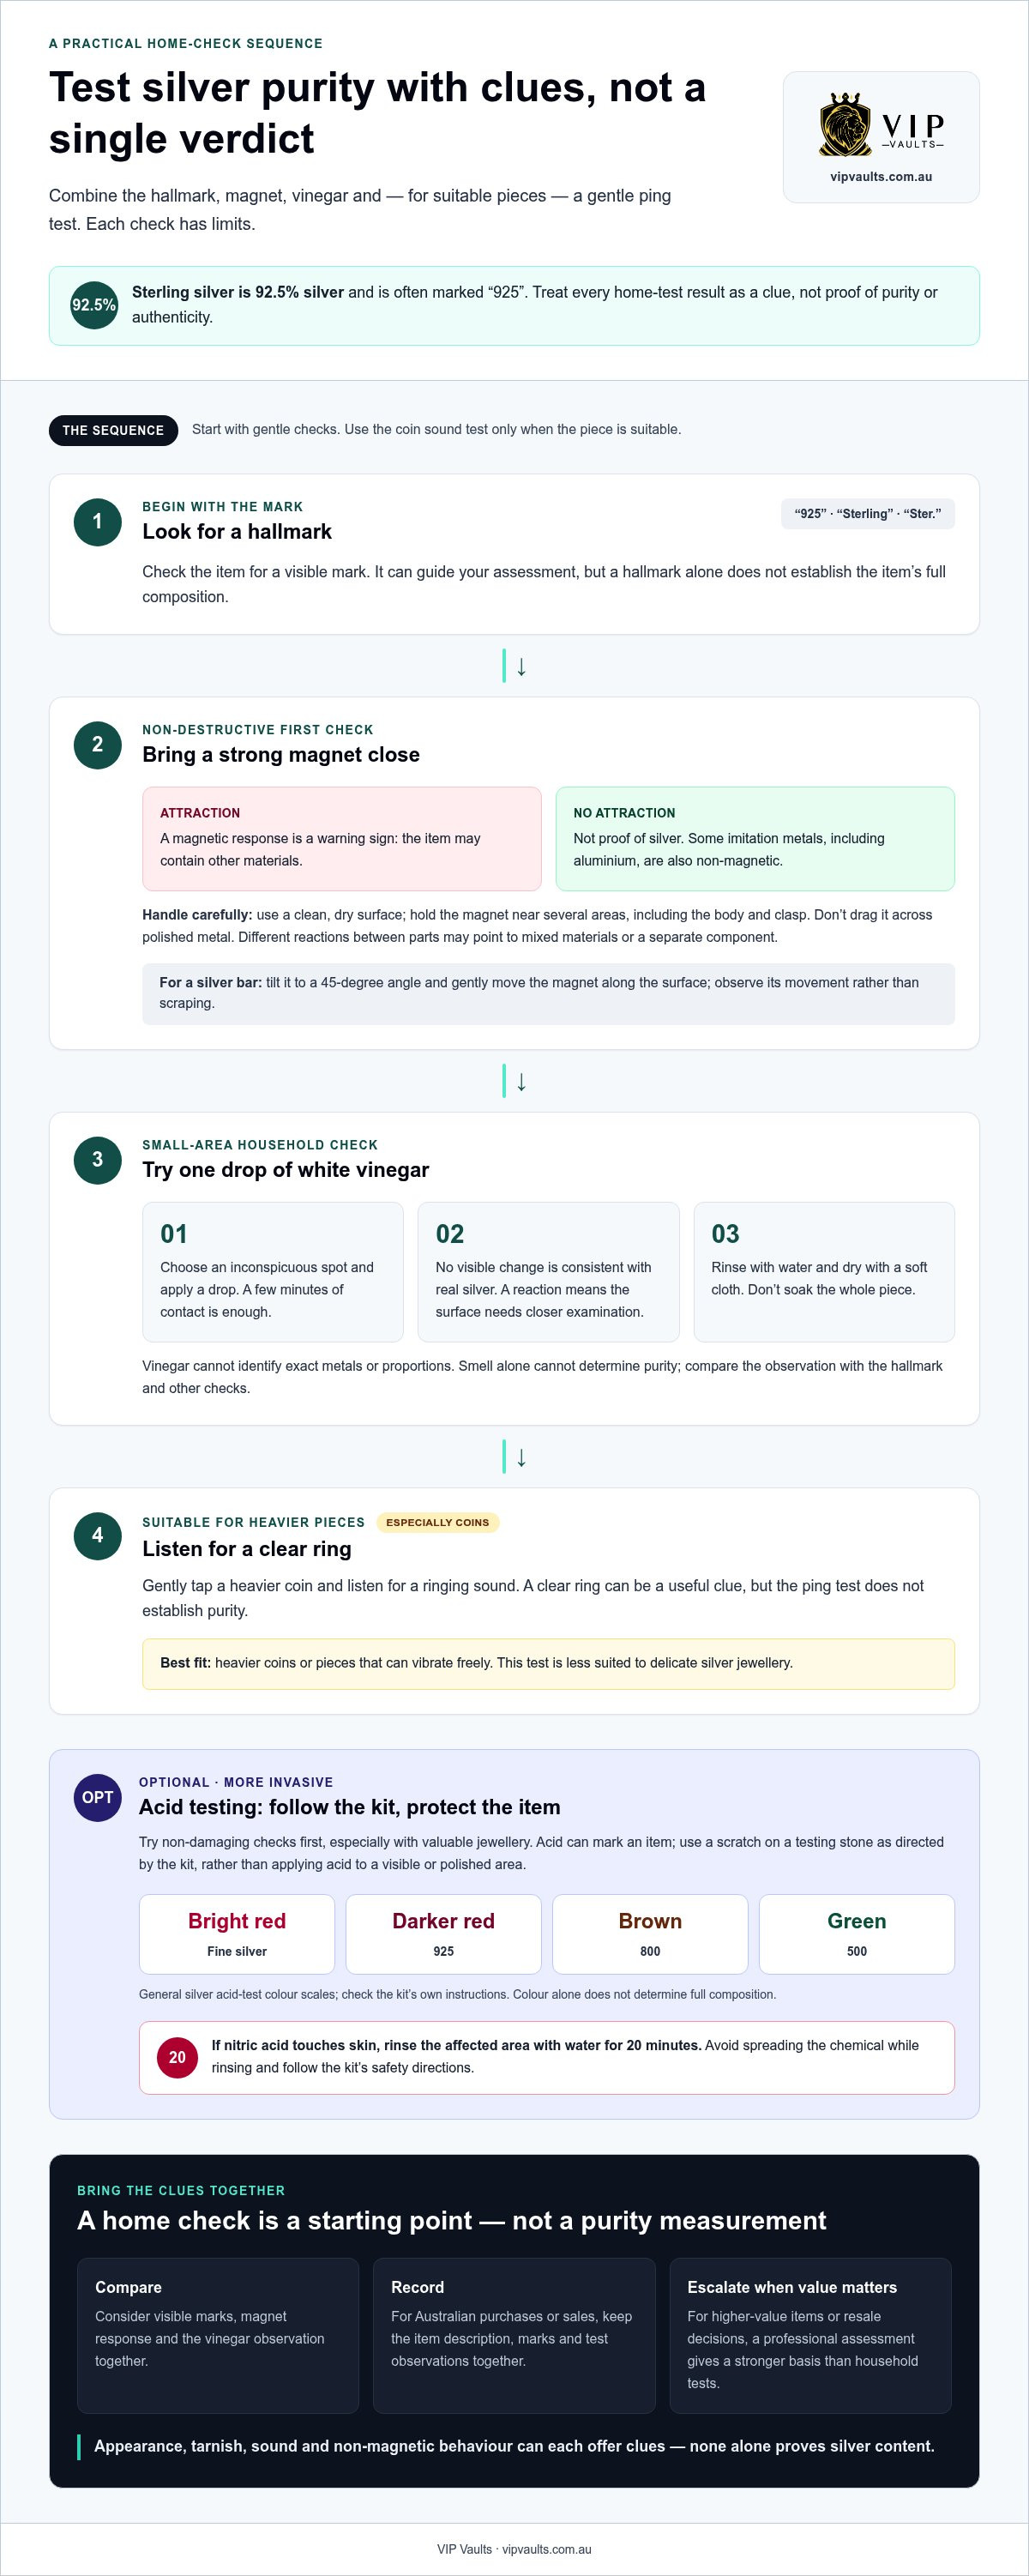
To test silver purity at home, combine a hallmark check with a magnet, vinegar and ping test rather than relying on one result. Sterling silver is 92.5% silver, often marked “925”; attraction to a strong magnet suggests an item may not be sterling, while a clear ring from a gently tapped coin can be a useful clue.
A quick household test can help you decide what to examine more closely, but it can’t establish an item’s exact silver content on its own. If you’re wondering how to test silver purity at home, start with simple checks and treat each result as a clue, not proof. This guide explains what magnet, vinegar and ping tests can reveal, how to try them carefully, and where their limits lie. You’ll also learn why the ping test can be useful for coins and heavier pieces, how to interpret common silver marks, and what precautions to take with an acid testing kit. The signs make more sense when considered together.
Key Takeaways
- Use a strong magnet as an initial screen, but don’t treat a non-magnetic result as proof of silver purity.
- Try a small drop of white vinegar on an inconspicuous area and watch for a change.
- Gently tap a heavier coin and listen for a clear ring; this sound can offer a useful clue.
- If using an acid testing kit, take care to avoid skin contact and rinse exposed skin with water for 20 minutes.
Magnet test
A strong magnet is a simple, non-destructive first check. Test gently, and treat the result as a clue rather than proof that an item is silver.
Prepare for magnet testing
Choose a strong magnet and a clean, dry surface. This check won’t scratch or chemically alter the item if you handle it carefully. Hold the magnet close, but don’t drag it across polished metal. That helps protect the finish and avoids marks from grit caught between the magnet and the item.
Consider the limits of magnet testing
Compare the magnet’s reaction with the item’s hallmark, if visible. A magnetic response may suggest the item contains other materials, but it is not conclusive. However, some imitation metals, including aluminium, also show no attraction. A non-magnetic result therefore cannot certify purity or prove authenticity.
- Check the piece for a “925”, “Sterling” or “Ster.” mark. These marks can guide your assessment, but the magnet test examines only the metal’s magnetic response.
- Hold the strong magnet near several areas, including the body and any clasp. Note whether one part reacts differently, which may indicate mixed materials or a separate component.
- For a silver bar, tilt it to a 45-degree angle. Move the strong magnet gently along the surface and observe its movement, rather than scraping the bar.
- Record whether the item attracts the magnet, then compare that observation with its marks and construction. Attraction is a warning sign; no attraction alone doesn’t establish silver purity.
Safety precautions for acid testing
Acid testing can mark an item, so reserve it for suitable pieces and follow the kit instructions. Try non-damaging checks first, especially with valuable silver jewellery.
- Choose the right item. Don’t apply acid directly to a visible or polished area. Acid testing uses a scratch on a testing stone, which can avoid marking the item itself. Follow the kit’s instructions for taking and testing that sample.
- Set up carefully. Keep the kit stable and work methodically to avoid spills or contact with skin. Use the supplied tools as directed, and keep the test area clear of other items. Don’t improvise with household chemicals.
- Follow the kit’s colour guide. General silver acid-test scales show bright red for fine silver, darker red for 925, brown for 800 and green for 500. Read the result against that kit’s own instructions; colour alone doesn’t determine an item’s full composition.
- Rinse exposure promptly. If nitric acid touches your skin, rinse the affected area with water for 20 minutes. Avoid spreading the chemical while rinsing, and follow the kit’s safety directions.
- Keep the purpose in mind. A home kit can offer a clue, but resale decisions call for a reliable assessment of composition. For higher-value items, a professional assessment can provide a stronger basis than a household test.
- Compare lookalikes carefully. Silver-coloured aluminium and silver-plated items can resemble real silver. Their appearance alone can’t show whether the underlying metal is sterling silver. Tarnish is one visual clue, but it should not be treated as a complete assessment of an item's purity.
- Use sound as a separate clue. Gently tap a heavier coin and listen for a ringing sound. This test suits heavier pieces better than delicate silver jewellery, and it doesn’t establish purity.
For Australian purchases or sales, keep the item description, visible marks and test observations together. Clear records help you compare what was represented with what you assessed. If you’re safeguarding silver bullion, consider secure silver storage as part of protecting your holdings.
Vinegar test
Start with gentle household checks on an inconspicuous area. Vinegar, an ice cube and baking soda can offer different clues, but none measures silver content directly.
- Apply a drop of white vinegar. Choose a discreet spot on the piece, then place one drop of vinegar on it. A few minutes of contact is enough for this simple check. No visible change is consistent with real silver, while a reaction signals that the surface needs closer examination. The smell alone cannot determine purity.
- Rinse and dry the test area. After the vinegar check, remove residue with water and dry the item with a soft cloth. This keeps vinegar from lingering on silver jewellery or reaching nearby materials. Don’t soak a whole piece simply to extend the test; the method relies on observing a small area.
- Compare the result with other methods. Sterling silver contains copper alongside silver, so a household reaction cannot identify the exact metals or their proportions. Pure silver and silver-plated pieces can also present different surfaces. Use a hallmark or another assessment alongside the vinegar observation rather than treating one result as a purity measurement.
- Try the foil and baking soda method cautiously. Place foil in a container, add hot water and baking soda, then position the tarnished piece in the mixture. Reduced tarnish is presented as a sign of real silver. Since real silver tarnishes naturally, a change in appearance reflects tarnish removal, not a precise purity reading.
- Use an ice cube as a separate comparison. At room temperature, place an ice cube on the item and observe how quickly it melts. Silver’s thermal conductivity transfers heat efficiently, making rapid melting a useful clue. Compare with an ordinary metal object, but remember that conductivity doesn’t establish silver content.
- Skip bleach on valuable pieces. A bleach dab test involves observing the jewellery for 5 to 10 seconds, but bleach can affect surfaces. Avoid this method on valued or delicate pieces; vinegar and ice provide less invasive observations.
Ping test for coins
- Choose a suitable coin. Select a heavier silver coin with room to vibrate freely. The sound test is best suited to heavier items, such as coins or rings. Avoid delicate jewellery, where a tap may cause damage and the sound is harder to judge.
- Check the coin’s condition first. Look for a visible mark, plating wear or a damaged edge. A plated coin can have a different metal beneath its silver-coloured surface, affecting its sound. Don’t assume a bright finish proves the silver is real.
- Hold the coin lightly. Support it near the edge between your fingers, leaving most of the coin unobstructed. A firm grip can dampen vibration and shorten the sound. Keep the coin over a soft surface, so it won’t be damaged if dropped.
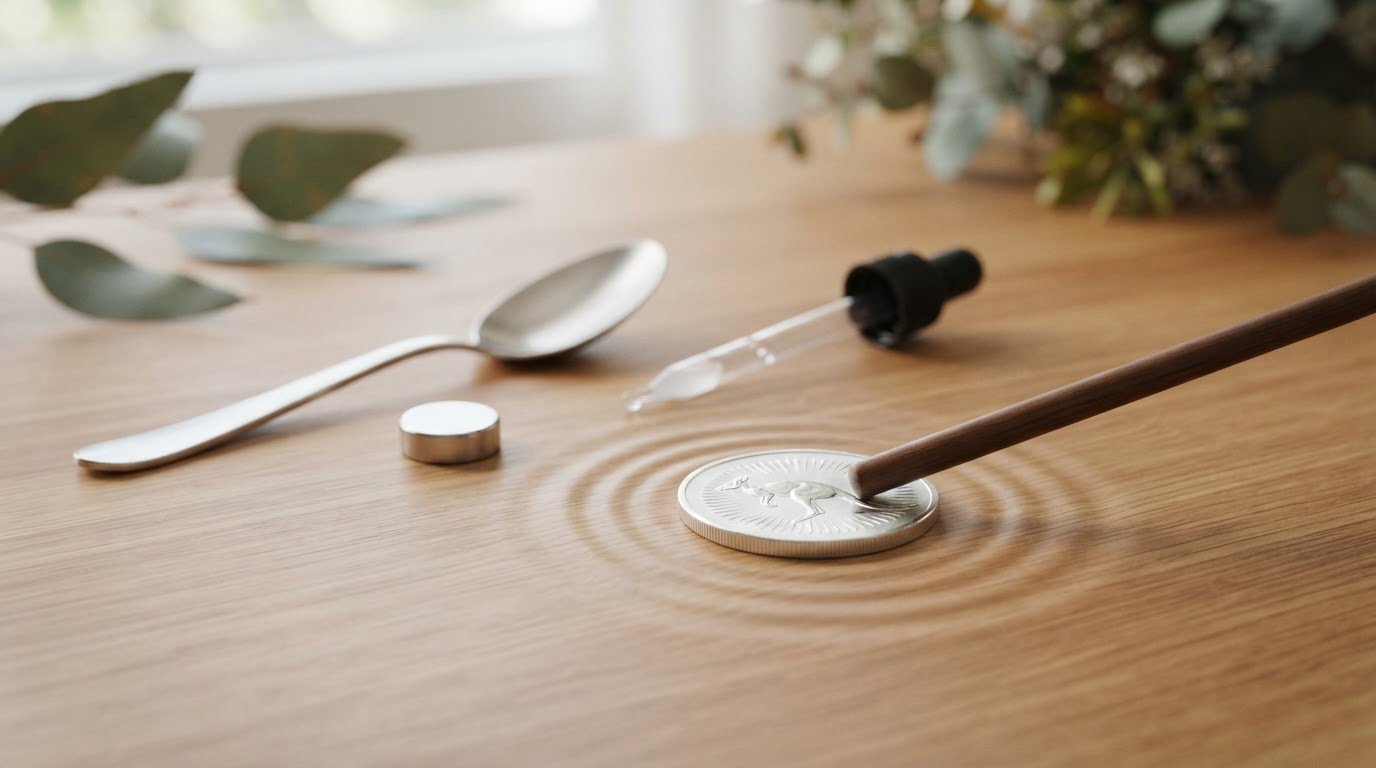
- Tap gently and listen. Use a non-damaging object to tap the coin, then note whether it gives a distinct ringing sound. Avoid striking hard or scraping the surface. The ping is a clue from the coin’s vibration, not a direct reading of its silver content.
- Repeat the test consistently. Tap the same area with similar force and compare the sound. A dull or brief tone can reflect the coin’s shape, wear or construction. Record what you hear rather than changing your tapping strength between attempts.
- Compare clues, not conclusions. Sterling silver contains 92.5% silver, but a ping cannot measure that proportion. Tarnish also occurs naturally on silver, while plating may conceal another metal. A sound test assesses neither the coin’s full composition nor its surface layers.
- Use another assessment for important decisions. A hallmark check or acid test can add information, though acid testing may mark an item. For silver bullion you intend to hold securely, explore silver bullion storage as a practical next step.
VIP Vaults & Bullion Exchange Perth: Private Vault Rental
VIP Vaults & Bullion Exchange Perth offers private vault rentals for people who want secure storage for valuables. After assessing silver at home, consider how you’ll protect it, particularly if it belongs to a larger collection. A magnet, vinegar or ping test can inform your assessment, but it doesn’t replace secure storage for silver bullion or other important holdings.
Private vault rentals and bullion lockers offer a storage option for bullion owners who want to keep silver holdings outside the home. VIP Vaults & Bullion Exchange Perth also sells silver and gold bullion.
Explore private vault rental options with VIP Vaults & Bullion Exchange Perth for secure storage of your silver holdings.
Make a considered next move with your silver
Knowing how to test silver purity at home gives you a useful starting point, but identifying an item and deciding how to store it are separate steps. After assessing a piece, consider how it fits into your wider precious-metals plans. Keeping clear records of what you own and where it is stored can help you manage your holdings.
VIP Vaults & Bullion Exchange Perth offers private vault rentals and bullion lockers for storing valuables, as well as gold bullion. If secure storage is your next step, explore the options and choose what suits your needs.
Explore Private Vault Rental and Bullion Locker options, and take your next step with confidence.
Frequently Asked Questions
What Is 925 Silver and Why Does It Matter?
925 silver, also called sterling silver, contains 92.5% silver and usually 7.5% other metals, commonly copper. That alloy makes the material more suitable for everyday jewellery than softer fine silver. The mark helps identify the stated silver fineness, which matters when assessing a piece’s composition. It doesn’t, by itself, prove the item is genuine or show whether every component has the same metal content.
How to do the magnet test on silver and what are its limits?
Hold a strong magnet near the item and note whether any part is attracted. Test the body and clasp separately, since jewellery can combine different materials. Attraction suggests the tested area may not be sterling silver, but a non-magnetic result doesn’t establish purity: some imitations are non-magnetic too. Treat this as one observation alongside marks, construction and other evidence, not as a definitive authenticity test.
How to test silver with an ice cube at home?
Place an ice cube on a dry silver item at room temperature and observe how quickly it melts. Silver conducts heat well, so it can transfer heat to the ice quickly. For comparison, place another cube on a similar-sized object made from a different metal. Temperature, thickness and contact affect the result, so this method can suggest silver but can’t measure its purity.
How to identify silver hallmarks such as 925, 999 and sterling silver?
Inspect discreet areas such as a ring’s inner band or a clasp for stamped marks. “925” and “Sterling” generally indicate sterling silver, while “999” or “.999” denotes fine silver at 99.9% purity. A mark can be small, worn or difficult to read, so use good lighting and magnification. Treat the stamp as an identification clue, not proof of the item’s entire composition.
How accurate are home silver purity tests compared with professional testing?
Home checks can help screen an item, but they don’t reliably establish its exact composition. A hallmark, magnet response or ice test offers a different clue, while surface plating can complicate the results. Professional assessment can examine composition more directly; XRF analysis identifies metal composition within seconds. If you’re learning how to test silver purity at home before a sale, use household checks as preliminary observations, not as a definitive valuation.
What are the risks of scratching or using chemicals to test silver?
Scratching can leave a visible mark, especially on polished jewellery, and acid testing can damage the tested area if used incorrectly. Keep chemical tests away from skin and follow the kit’s instructions; rinse skin exposed to nitric acid with water for 20 minutes. Avoid improvised chemicals or testing valuable pieces in visible areas. Start with non-destructive observations, and reserve invasive testing for a suitable sample.